
Workshop reflections and photos
The e-embroidery workshop organized on 17.-18.3.2012 in Helsinki at the Cable Factory turned out to be lots of fun! Nearly 20 people participated in the workshop, enthusiastically stitching yarns and experimenting with LEDs. We, the organizers, were impressed by the
Workshop reflections and photos
The e-embroidery workshop organized on 17.-18.3.2012 in Helsinki at the Cable Factory turned out to be lots of fun! Nearly 20 people participated in the workshop, enthusiastically stitching yarns and experimenting with LEDs. We, the organizers, were impressed by the

LED circuit and battery holder tutorials
Here you can find the instructions made for the e-embroidery workshop in Helsinki in March 2012. The first tutorial shows how to construct a circuit with a LED, conductive yarn, battery and metal buttons, while the second one tells how
LED circuit and battery holder tutorials
Here you can find the instructions made for the e-embroidery workshop in Helsinki in March 2012. The first tutorial shows how to construct a circuit with a LED, conductive yarn, battery and metal buttons, while the second one tells how
Workshop approaching!
This weekend, a bunch of e-embroidery enthusiasts will get together in Helsinki at the Cable Factory, putting their hands on yarns and LEDs. We are happy and grateful to announce that we will have some more helping hands to assist
Workshop approaching!
This weekend, a bunch of e-embroidery enthusiasts will get together in Helsinki at the Cable Factory, putting their hands on yarns and LEDs. We are happy and grateful to announce that we will have some more helping hands to assist
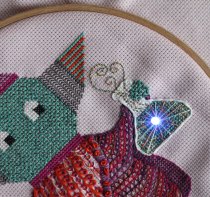
Anglerfish PartII : embroidery and circuit planning
To make the embroidered anglerfish light up the following materials were required: 1. A Light Emitting Diode(LED). For this one I used a small ultra-blue LED. 2. A 3V button cell battery – these batteries are quite convenient to use
Anglerfish PartII : embroidery and circuit planning
To make the embroidered anglerfish light up the following materials were required: 1. A Light Emitting Diode(LED). For this one I used a small ultra-blue LED. 2. A 3V button cell battery – these batteries are quite convenient to use
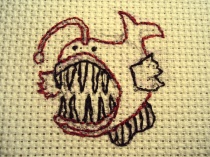
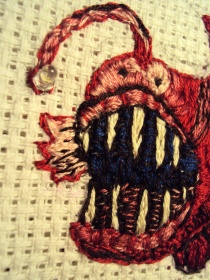
Starting e-embroidery: Anglerfish part I
As a beginner to embroidery I needed to first get some materials to start an e-embroidery project. I bought an embroidery hoop and some threads from HobbyPoint in Fredrekinkatu, Helsinki. It was more expensive than I had expected, I will
Starting e-embroidery: Anglerfish part I
As a beginner to embroidery I needed to first get some materials to start an e-embroidery project. I bought an embroidery hoop and some threads from HobbyPoint in Fredrekinkatu, Helsinki. It was more expensive than I had expected, I will

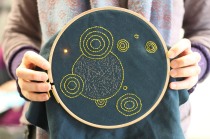
Narrative embroidery
Story telling through embroidered still-frames and interesting use of different media.
Narrative embroidery
Story telling through embroidered still-frames and interesting use of different media.

Some fun embroidery examples for inspiration
More links to embroidery images here.
